Building instructions for a star light

Draft: Peter Fehrentz Implementation: expert Time spent: approx. 4 hours All dimensions in centimeters.
Tool: Ruler, cordless screwdriver, jigsaw, 9 mm wood drill, sanding block, brush, side cutter, ruler 100 cm long or a straight wooden strip
Material: - 25 pcs. Bulb sockets E27, black, (eg Düwi no. 13055) - 25 pcs. Bulbs E27, 15 W, D = 60 mm - approx. 1.5 m Power cable with plug, black - Cord wiper dimmer 20 - 400 W, 230 V by Conrad Elektronik - approx. 3.6 m power cable, black sandpaper K180 - acrylic paint black by Sikkens
cutting: - MDF 16 mm: 1 piece à 105 x 100 cm
Step by step to the starlight:

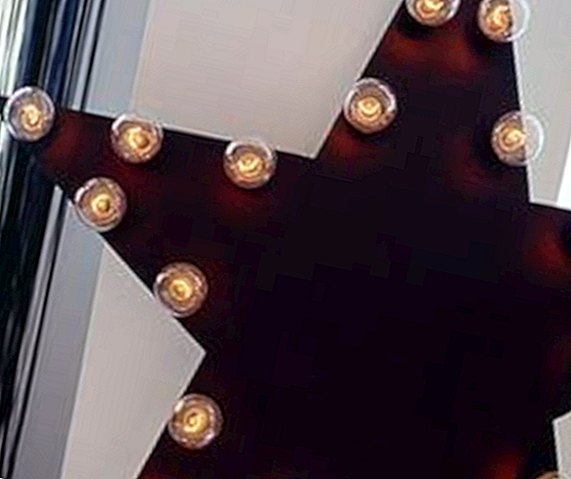
1. On the 105 x 100 cm MDF board, draw a frame that recirculates 2.5 cm (see red line).
2. Transfer the end points of the star tips to the red frame according to the dimensions (see fig.). Use ruler and pencil to join the corresponding points (see blue lines).
3. Saw the contour of the star with the jigsaw. Sand the edges smooth and easily break the edges.
4. Now draw the contour of the star around 3 cm backwards (see green line). On this line mark the drill holes (positions see Fig.). Finally, drill the holes with the 9 mm drill bit.
5. Remove the sanding dust and paint the entire star with the black acrylic paint.
6. While the paint is drying, prepare the cabling of the lamp holder. For this you need the 1.5 m long cable and 24 15 cm long sections of the power cable. To cut the cable, use the side cutter.
7. Insert a socket into a hole in the tip of the star and connect the 1.5 m cable to the luster terminal of this socket. Then put a second version in a hole next to it. Now connect the first version with the 15 cm cable with the second socket. Then insert a third version into the star, connect it with the second one, etc ...
8. Halve the 1.5 m cable and close the dimmer. Finally, turn the bulbs into the sockets, plug the plug into the socket and the star is lit.
Note: To connect and connect the light, you should hire an electrician!


