The BYM.de knitting school
Striking stitches
Knitting starts with stitching stitches. You take two knitting needles in one hand, so that the row of stops becomes elastic.
From a ball, a thread end is unwound, which must be at least three times as long as the intended stop width. For practicing, you should use smooth wool, so it is easier to knit.
That's how it's done!
1. Tighten a noose around the thumb and forefinger of the left hand. The thread over the index finger comes from the ball, which is guided around the thumb is the long thread end.

2. Using your right hand, prick the needles into the loop from the back and pull the thread down.

3. Pass the thread of the index finger through the newly formed loop and tighten the thread end. The first stop stitch lies on the needle.

4. Now place the end of the thread around your thumb and the thread of the ball around your index finger. Lead the needles from the front through the noose on the thumb.

5. The thread of the index finger is pulled through the thumb loop. Then take the thumb out of the loop and at the same time pull the thread end tight.
Repeat the 4th and 5th steps until the desired number of stitches is reached. Then pull a knitting needle out of the stitches. The stitches remain on the other needle - and off you go.
Kraus right

In this very simple knitting only right stitches are worked. Right stitches look smooth in the rows of stitches (on the front / right side) and frizzy in the back rows (on the back / left side). The mesh pattern has the same plastic transverse ribs from both sides. If the color change is made with stripes on the right side, a smooth transition occurs. When the color change is made on the left side, there is an interlocking transition
Right stitches

1. The thread is behind the work. The right needle pierces the next stitch of the left needle from the front.

2. The suture is pulled through the loop with the right needle, which then slides off the left needle. The new stitch is on the right needle.
Left stitches

Left-hand stitches have transverse ribs, similar to the knitted stitch on the right, but flatter. You need left stitches, among other things, to knit smooth right. On the back they appear as right stitches.

1. The thread is in front of the right needle. This is stung with the thread lying on it from right to left in the first stitch of the left needle.

2. Pull the thread from front to back through the loop, which slides from the left needle. The new stitch is on the right needle.
Smooth right

A smooth right knitted part consists of right and left stitches. Image: All stitches are knitted in the rows on the right, in the back rows on the left.
edge stitch

To get clean edges on a piece of knitting, knit the first and last stitch in each back and forth row to the right. It facilitates the later sewing together of the knitted parts and the knitting of stitches out of an edge.
Right and left crossed stitches

Right and left stitches, which are knitted twisted, are called interlaced stitches. Right-knit stitched stitches are particularly suitable for cuffs that consist of right and left stitches, the knitted part remains very elastic.
From the back into a right ... (further see next picture)

... or pierce the left stitch and pull the thread through. Slip the stitch from the left needle.
increases

If you want to increase the number of stitches in a row, you can make a new stitch from the cross thread between two stitches. The transverse thread is lifted onto the left needle and, so that no hole is formed, knitted on the right or left. Picture: The raised transverse thread at right stitches.

The transverse thread is knitted on the right side.

The raised transverse thread at left stitches.

The transverse thread is knitted on the left.
Increases on one side

If you want to increase several stitches at the same time on one side of a piece of knitting, you can only do this at the end of a row without having to cut the thread. Put the thread around the left thumb in a loop for the new stitches to be put on. Picture: The needle in the right hand is guided from bottom to top through the sling. A new stitch is created on the right needle. Put on the thread.
decreases
If you want to remove stitches within a row, knit two stitches together on the right or left side. If a piece of knitting on a right side is to become narrower, remove stitches at the beginning of the rowing. Knit one edge stitch to the right, then lift the next stitch on the right needle as if to knit right, then work the next stitch on the right and pull the lifted stitch over the knitted stitch. Continue to work the rest of the back row and the back row in the basic pattern.

Repeat the back and forth series continuously.Since it is not always necessary to remove a stitch in each row, the decreases can also be made at longer intervals.
... on a left side

If you want to narrow a knit on a left side, you must remove stitches at the end of each row. At the end of a row, knit the last two stitches in front of the edge stitch. The right needle pierces from the front first into the second, then into the first stitch on the left needle. The suture is pulled through both meshes with the right needle, and both sutures slide from the left needle. On the right needle is just a new stitch. Knit the edge stitch on the right. Then continue working in the basic pattern. Image: Repeat the back and forth rows continuously. Not always in every row a decrease is made. The distances can be larger.
envelope

An envelope is needed for hole patterns or increases. Pass the thread from front to back over the right needle before working the next stitch. Knit off the envelope in the next row. He then appears as a new scam. Picture: If you knit the envelope on the right folded (on increases), he inserts himself into the stitch pattern. A hole is made if the envelope is not knitted unknotted.
Close stop row to round
If a piece of knitting with a double-needle play (five needles of the same strength) or a circular needle is used in rounds, the row of stitches must be closed for the round. For this one knits on the first ailing stitch on. Make sure that the row of stops on the needle does not twist! One can not correct the error later, but must separate the whole part.
Bind off the stitches

If you want to end a piece of knitting, the last stitches must be loosely tied off. Knit two stitches and use the left needle to draw the 1st stitch of the right needle over the second stitch. Then knit another stitch and pull the stitch over it. Bind off all stitches at this rate. Pull the thread end through the last stitch and sew later. Picture: When decuring knit the stitches as they appear, right stitches on the right and left stitches on the left.
Binding inside and on the sides of a part
For a neckline, the middle stitches of a knitwear must be chained off. Knit in a row to the beginning of the cut in the basic pattern and close these stitches. Then knit the next two stitches and pull the 1st stitch over the 2nd stitch. Knit the 3rd stitch and pull the 2nd over and so on. Bind off the loops loosely so that the neckline becomes elastic. When you have choped off enough stitches, continue knitting in the basic pattern and finish this side of the piece of knitting first. Then you work on the disused stitches, starting with a back row.
Are chained on the sides of stitches, z. For example, for armholes, this is always done at the beginning of a row: on the right side of a piece of knitting at the beginning of the back row, on the left side at the beginning of the back row.
Knit stitches out
If a pullover gets knitted panels, knits have to be knitted out. One punctures with a knitting needle next to the edge stitch from the front into the knitting piece and fetches the thread from back to front.
Image: This process is repeated until you reach the desired number of stitches, then start the pattern in the next row.
Sew together in stitch stitch

The stitch stitch connects two parts together. This seam looks like knitted. A thread is drawn into the exposed stitches of both parts with a needle without a tip. In this way, you can also repair a piece of knitting if a thread is torn. Picture: First take 1 stitch, then 2 stitches of the second piece, then back into the 1st and following stitches of the first part and back into the last and next stitches of the second part until the seam is closed.
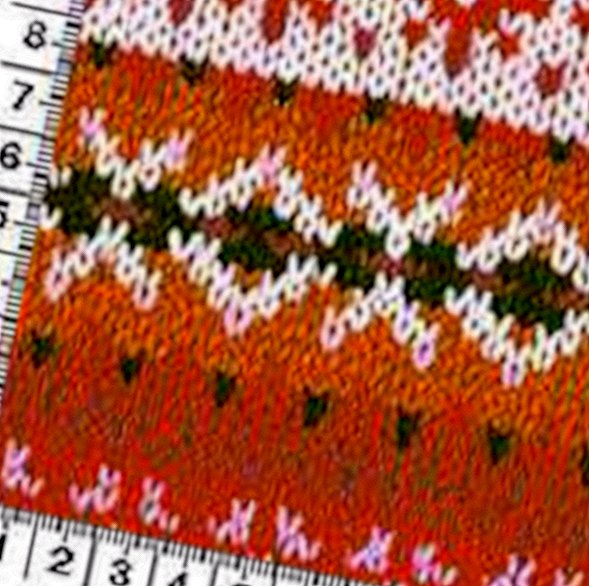
swatch

Before you start a sweater, be sure to make a minimum of 10 cm square mesh to compare it to the given swatch in your guide. Following a guide, you can only judge if you use the specified material or a fine or strong wool. Picture: It is important to make the stitch sample in the same pattern as the knitting model!
Thicknesses are compared according to run lengths printed on each bobbin of a ball. If your mesh match the pattern, you can start knitting. If your mesh sample has too many stitches, take half a needle size larger. If she does not have enough stitches, knit smaller with half a needle size. Try on patterns and knit sweaters!


