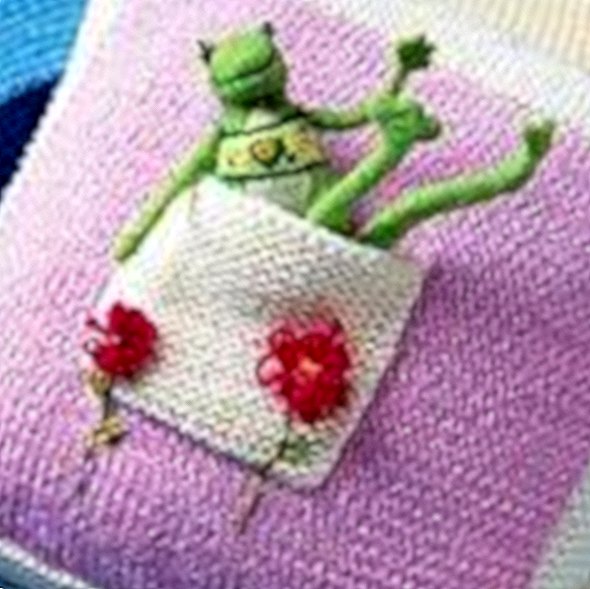
Cuddly pillow to make your own
Knitting the pillow

You need: 2 x 50 g merino wool in orchid (color No. 33, Schachenmayr nomotta about Coats GmbH), 2 x 50 g merino wool in nature (color No. 02, Schachenmayr nomotta), knitting needles in size 4, wool remains in fuchsia, green and Yellow, pillow filling 35 x 35
How to do it: Double the wool while knitting to make the pillow nice and cozy. Wrap one-third of the doubled wool in nature as a ball of wool. Cast on 60 stitches with the remaining wool in the natural way and knit 12 rows of right stitches.
To get the frame, the outer 6 stitches with the wool in nature continue to knit only right. The wool in orchid is knitted in the rows on the right, in the back rows on the left. So that the natural-colored wool does not have to be continued at the back, the additional ball of wool is used. After a total of 86 rows, 12 rows are again knitted with all 60 stitches in the natural white wool on the right.
Cast on 20 stitches for the bag and knit 36 rows of right stitches. Sew the small piece of knitting with the embroidery needle and natural white wool in the center of the front of the pillow. For the larger flower wrap the fuchsia wool approx. 10 times around three stretched fingers and set in the middle. For the smaller flower, wrap the wool about two times around two fingers, set and fold both flowers slightly. Insert a few yellow threads into the flower center and cut very short. Then sew the flowers to the bag as shown.
Embroider the flower stems and leaves with the green wool. Knit the back just like the front, only without a pocket and without flowers. Then sew the front side flush with the back. Approximately Leave 15 cm open and feed the pillow. Now sew the rest and finally put the pet in it.
Felt the frog
You need the following material:
For the frog Felt or fairy-tale wool in light green about 25 grams, in natural white, dark green and yellow each about 2 grams, something in pink. 1 medium (or coarse) - and 1 fine felted needle foam about 20 cm x 20 cm and 5 cm thick - or a car sponge as a base for felting
For the frog scarf Wool rest in beige knitting needles size 3 - 3.5

And so the frog is made:
Needlefelting of a figure can best be compared to modeling using the working method. Only here is the shape of wool - and worked with the help of a felting needle. Thus, even with needle felting by laying and needling additional wool parts of the figure can be increased at any time. Narrower places and depressions are caused by increased piercing at the desired location. It is very helpful during the felt again and again to imagine the frog or to compare with the drawings.
Please always pierce the needle as vertically as possible in the figure, otherwise it bends and breaks very easily. In addition, you can use such targeted needles and the risk that you sting is much smaller. When working on the foam pad, always turn the frog over so that it can be inserted correctly. In between, loosen the figure from the base, otherwise the wool fibers will bond too tightly with the foam.
- From about 13 grams of light green wool, wrap a fairly solid pear-shaped "cone" as a frog's torso. Which should have the approximate size of the dashed outline. Now fix the shape by evenly piercing with the middle (or coarse) felting needle. Do not forget to turn the frog body over and over again and work on all sides.
- When a nice grippy shape has been created, suggest with the finer needle by intensified pricking on the frog legs contours. And work out a nice narrow neck in the same way.
- Need an oval head from about 5 grams using the original drawing. In doing so, work the front part of the face a little narrower and flatten it slightly from the front with targeted punctures. Put the head in the correct position on the body and wrap some of the green wool around the point of attachment and then firmly pin it until no transition is visible.
- Now roll two arms out of two equal strands. Leave unprocessed fibers at the top and bottom of the rolls. From these, the hands are later worked and made the attachment points for the shoulders. Now by even grooving all around - felt good arms. To make the hands, fold the unprocessed wool fibers at the bottom of the arm so that they lie twice and then needle flat semicircles. Pin excess fibers on the arm. Then on the hands by pulling back and stabbing some fibers which indicate "fingers".
- Always work two equal body parts in parallel so that they later have the same proportions.
- The legs are needled using the same principle and using the template.However, they are longer and thicker and have larger frog feet with only three curves.
- To complete the frog, the arms and legs are connected to the body. To do this, look for the right positions and nibble the protruding fibers well on the body.
- Roll up two small white balls and carefully pry two eyes on the base. Stitch them firmly on the head and cover them with dark green wool from the back. With rather delicate stitches work up two dark green elongated pupils. Then pull out a thin strand of dark green wool, roll it forward and pin it as a smiling mouth.
- Now pick up some white wool as a bright tummy with numerous not so deep stitches. Apply the yellow shirt in the same way. The dark green edge contours, polka dots and the tricolor heart last work up. The dark green dots pretty around distribute.
- Cast on six stitches for the scarf and knit 36 rows loosely with the right stitches and bind off last.
- Have fun!
Information about needle felting
Needle Felting is a relatively young felting technique in which, without the use of hot water or soapy water, it is possible to create beautiful plastic figures and decorations (such as the frog sitting in a knitted pillow) using a felt felt needle made of colored felting wool. For this purpose, with the felting needle, which has a few hooks on a foam pad again and again stuck in the felt wool, so that the wool fibers hooked together and creates a solid shape.
In the needle felting technique, however, versatile applications can easily be felted onto various textile substrates such as felt, knitted fabric and fleece. To do so, it is best to use what is known as felt - fairy tale or nonwoven wool, which is now available from various manufacturers in specialized shops or on the Internet. The needles are available in three different strengths. The coarse needles are best suited for the production of plastic figures and the fine needles for fine ornaments and applications. Always pierce the needle vertically so that you do not sting and the needle does not jam and break. The wool used should have fibers as short as possible, as they catch each other better and faster than with the heavily combed wool. When felting the appliqués, the wool is laid out within the recorded shapes and pierced evenly over the surface with the vertically guided felting needle. Until a nice uniform surface is created. It can gradually be laid on and wool repeatedly felted until the desired thickness is achieved. The contours become particularly beautiful and vivid when the wool is first pushed onto the lines with the needle and then struck. New colors and delicate embellishments are simply pinned on later with careful stitches. In between, carefully remove the workpiece from the surface again and again.
Recommended reading

"Simply Felt - 20 Trendy Projects" by Margaret Docherty and Jayne Emerson. (Main-Verlag)
Are you looking for felt objects to work on? Do not you know what to do with old wool sweaters? Are there any wool remnants left in the closet that you want to process? This book presents twenty projects that are easy to rework and at the same time convince by their design.


